
There is one class of Linux applications that everybody tries their coding hands at writing, system monitors. Anyone who spends any serious time on a Unix/Linux system will at some point want to start a system monitor to check and keep a long-term eye on their system’s health. System monitors run the gamut from the original text-based top that runs in a console to graphical versions available on today’s Linux systems. Two of them are System Monitor and Resources.
System Monitor
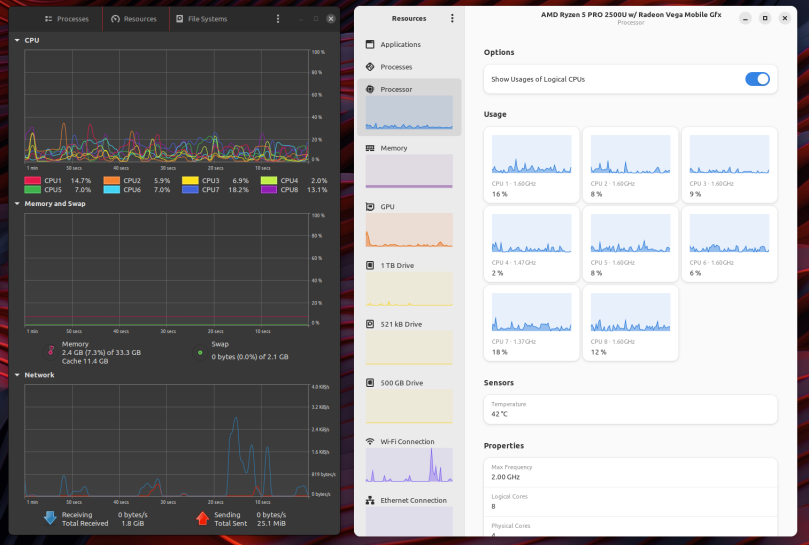
System Monitor is a part of the Gnome Core Applications. I don’t know how far back the core applications go, but I suspect nearly three decades; I’ve know of System Monitor, or its ancestors, going back to the late 1990s and Redhat Linux, before Redhat went Enterprise. As a part of the core applications you will find it automatically installed on any distribution that has the Gnome Desktop, such as Debian, Ubuntu, and any Ubuntu derived distribution such as Linux Mint, to name but a few. In its current incarnation it has picked up a plethora of preferences. The demo capture shown above is using System Monitor’s measurement defaults where system monitor is constantly measuring and displaying results as a smoothed graph across all its major performance views. That’s why you see CPU activity across all cores on my system, a system that should, ostensibly, be idle. When I descended into Preferences, under Resources, and decreased the sampling rate from 0.1 seconds to 2 seconds, then turned every toggle off except Draw Charts as Smooth Graphs, System Monitor’s impact on the general system dropped by over 60%. But it still had a measurable impact.
While System Monitor’s views are clear enough, the CPU view can get quite tangled on modern systems with dozens of cores. My modest system only has eight to track, yet it’s almost useless to quickly read. A much better CPU track is with either htop or btop inside a console, or Resources below.
Apps for GNOME — https://apps.gnome.org/
Resources
Resources is a modern tool, written completely in Rust, which may surprise many people as Rust isn’t known for developing native GUI support. What the author of Resource has done is use Rust crates that wrap Gnome widgets and Adwaita so that they can be used within the application. Since Resources is open source, and the source is on Github, you might want to peruse the sources just to get an idea from Resources’ sources on how to add a GUI to your Rust application.
I find the design and layout of Resources to be quite a bit easier to deal with than System Monitor. As much as it pains me to say this, Resources borrows how Windows resource monitor monitors CPU usage, which I approve of personally.
All the major measurement subsystems are arrayed down the left bar, making everything just a single click away. I find that Resources’ impact on overall system performance to be much lighter than System Monitor, leaving Resources running up on my desktop isn’t an issue. I like the feature where if I don’t want the left bar, all I have to do is shrink the width of Resources and the left side bar will snap out of sight.
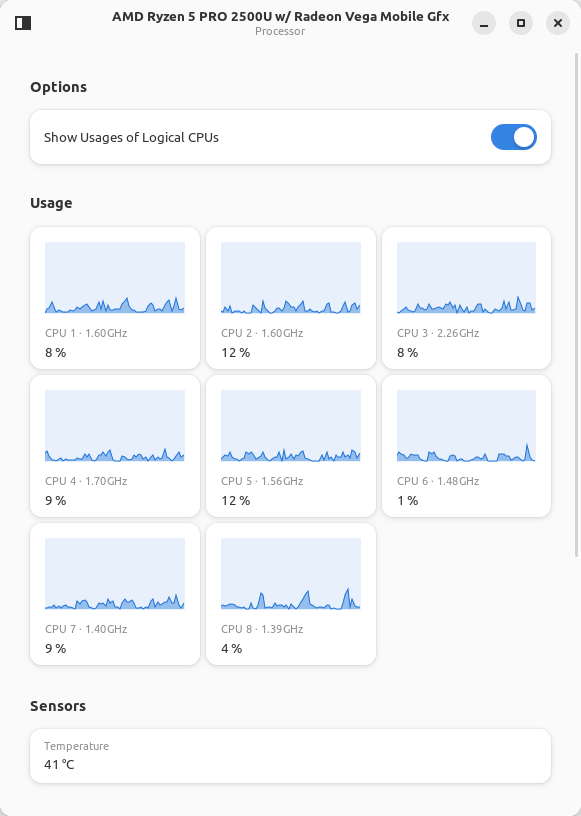
I find for my needs that Resources view above to be all I need for monitoring from my desktop. I even appreciate the temperature view, especially when I have my system under heavy load. This little box I have will throttle due to temperature, so when the fans are really loud I can quickly check to see how the system is performing, and take action if necessary.
Resources Github — https://github.com/nokyan/resources

You must be logged in to post a comment.