
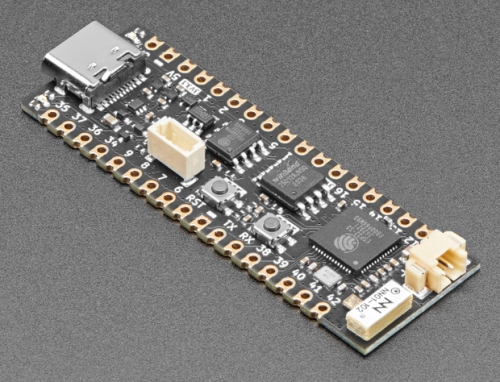
Two more ESP32-S3-based boards arrived yesterday, the Unexpected Maker ProS3 ( https://esp32s3.com/pros3.html ) I purchased from Adafruit ( https://www.adafruit.com/product/5401 ). At US$25 each, they’re creeping up into the price range of a low-end Raspberry Pi 3 or 4, that is if you could get any Raspberry Pi anywhere. One reason for my interest in the Espressif-based boards is because they’re the only devices available to develop with, except perhaps for the very high end ESP32-S3 Developer Kits and, as bad luck would have it, the Unexpected Maker ProS3. But at least I found these two.
The ProS3 is a well built board with some thought put into what features to include in its build.
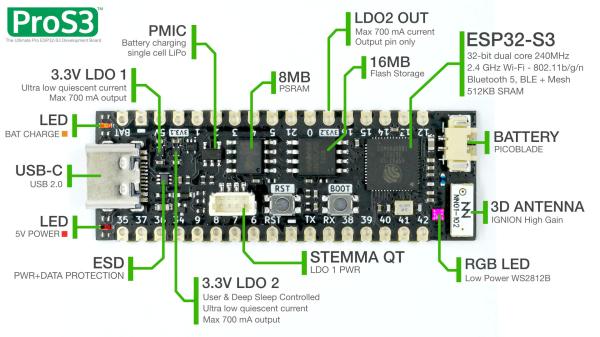
Figure 2 calls out many of the main features on the board. Thankfully it has a USB-C connector on one end, not micro USB. Note that the board edges are castellated, which allows the board to be surface mounted onto a larger PCB for easy inclusion into a larger product. The board is narrow, and all devices are mounted on the upper side. This means that everything is packed, and some work went into solving how to include certain features. For example the STEMMA QT connector is mounted 90° to the board, instead of parallel and on the edge with just about every other board of this type. Unlike every other ESP32-S3 board I’ve worked with, the MCU is in a very-narrow-pitch surface mount device. The board also comes with a very generous 16GB of FLASH and 8GB PSRAM, allowing for some expansive Circuit Python application development. Finally, there is a PicoBlade power connector on the right; the board ships with a PicoBlade-to-JST cable with each board. This allows me to use any of the LiPoly batteries I have, and the board will charge them.

The pinout in Figure 3 shows what features and functions are brought out to the edges of the device. When you purchase a ProS3 you get this exact diagram printed on heavy card stock. It’s a thoughtful touch that enhances the experience of using the ProS3. I appreciate having the pinout next to the device on my bench while I’m wiring up a circuit.
Another nice touch is that these devices came with Circuit Python 7.3.0 alpha installed, complete with two Circuit Python scripts that exercised the RGB LED on the board. I checked the Circuit Python site for the ProS3 ( https://circuitpython.org/board/unexpectedmaker_pros3/ ) to check what version is currently available and discovered it’s now at beta 2. I downloaded the latest and prepared to update the ProS3 and ran into a frustrating, but fixable problem. I found I couldn’t put the board into bootloader mode, and I couldn’t find the directions. I eventually found directions, but for a different board from Unexpected Maker. Here is what you need to do to put the ProS3 into bootloader mode (I’m performing this on a MacBook Pro M1).
- Put a finger over the Reset (RST) button and another over BOOT.
- Press and release Reset.
- Immediately after releasing Reset, press and release Boot.
- The RGB LED will go a solid green color, and PROS3BOOT will mount.
- Drag the latest Circuit Python UF2 file onto PROS3BOOT. The board will reboot back to Circuit Python on its on.
Once I learned the magic sequence it only took me a single attempt to put the board in bootloader mode. You don’t know how many times I tried the double-click Reset, or the RP2040 boot button sequence. Unexpected Maker has to be different. Of the three methods I know of I prefer the RP2040 boards sequence, because it’s not timing based, it’s sequence based. Unexpected Maker’s method is reasonably doable, as long as it’s clearly documented, especially on the ProS3 page. But no matter. Right now the board is running just fine and I’m beginning to think of what I can build from it.
As for the tools used for developing with Circuit Python, I can confirm that the latest versions of both Thonny and Mu Editor work just fine. And if those two work, I’m certain that just about everything else out there will work as well.

You must be logged in to post a comment.