
Being an old codger, I believe in the power of proper documentation. The better it is, the more powerful it can be, especially when newcomers to a given technology need excellent beginner’s steps to start properly using not just the technology but the tools of that technology. When I went to check the official “Creating an Android Project” on the Google site in case I’d missed something during its release (and as surely as the sun rises every day, I know I’ll miss something key when a new or updated tool is released), I was very annoyed to find that the documentation, especially the screen captures of Android Studio, where of the beta release. How did I know that? Because the little android still adorns the New Project dialog on the Google documentation.
Furthermore, the only visual aids given on that page are the New Project dialog. And so I’ve decided to go through every step in starting a new Android project with Android Studio, complete with commentary. If nothing else you can use this as a visual check list to make sure that your first (or second) project is being started reasonably properly.
Before You Start
Before we get started, make sure you follow these directions: “adding java and java-supported development tools to os x yosemite.” This covers how to install Java, Android Studio, and IntelliJ. The first two are of concern only if you want to just develop Android on Yosemite.
Starting a Project
After installing Android Studio, open up Launchpad or Applications in Finder and launch Android Studio. Click “Start a new Android Studio project.” This opens the “Create New Project” dialog. I’ve called my project Simple1. My so-called company domain is beebe.guru (because I actually have a domain through Google called beebe.guru). The project location can be anywhere. One comment to make about this dialog; when it opened no the Yosemite desktop it was pretty spread out. I had to re-adjust it quite a bit to make it small like the screen shot. As the button says click “Next.”
 For my uses I chose my minimum SDK to be for Android 5.0. Click “Next.”
 It’s time to add an activity. The Blank Activity is the first one in the list and the one I’ve chosen. It’s also the one that is given in Google’s older Android Studio example, so we’ll go with that. Click “Next.”
 These are all default options, so we’ll go with them. Click “Next.”
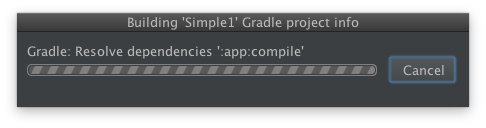 A dialog with a barber-pole busy stripe pops up next. You’ll see all sorts of activity printed above the moving busy stripe. You’re looking at the last activity before the dialog is programmatically removed.
 If this is the first time you’ve created an account, you’ll get a complete IDE with some extra dialogs over the top. The one dead center gives a tip every time you start the open IDE if the “New Tips on Startup” checkbox is checked. The green dialog in the upper right corner is asking you to share execution statistics with Google. I personally chose no.
 The default device is the Nexus 4, and not the Nexus 5, oddly enough.
 I’m not writing for a handset, but for my Nexus 7 2013 tablet. If you want to change to another device, click the dropdown menu as shown above (and don’t ask me what it’s named, because I have no idea), and select it. In this case I’ve picked the Nexus 7. I know this is the 2013 version because of the resolution and because the Nexus 7 2012 is marked explicitly as such.
 Here’s what the final IDE setup looks like with my project and my device. I’ve essentially created an Android “Hello World” application (as you can see in the screen emulation). In the next part of this sequence I’ll show how to attach an Android device (my Nexus 7) and side load this very simple application into the device. All this under Yosemite and the Mac Mini late 2012.
For those who’re curious, all of this operates identically on both Windows 8.1 and Ubuntu 14.10 Linux.
If you’re very curious, you can check the file system locations called out in the original Google documentation. I won’t duplicate them here.


You must be logged in to post a comment.