
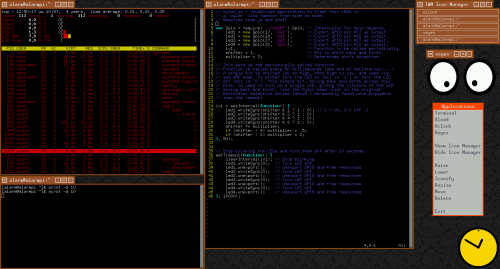
I surprised myself by how little time and effort was required to bring TWM and X back up on Arch Linux running on the RP3. This time around I didn’t try to install any other DE, just TWM. I had copies of my earlier TWM setup on my Ubuntu notebook, so I was able to simply mount the boot volume and make copies into the alarm account. I’ve had to make some minor tweaks to .twmrc, specifically disabling AutoRaise on everything. I discovered that automatic raise where the window pops to the top as soon as the mouse passes over it was a real annoyance, not the nice feature I thought it was in earlier incarnations. I also discovered I had to disable it because I couldn’t fully resize the xterm window. Now everything is back to something useful.
Here’s the list of packages I installed:
- xorg-xinit
- xorg-twm
- xterm
- xorg-server (note: this comes up asking to chose a repositor to load from; take all defaults)
- xorg-server-utils
- mesa
- xf86-video-fbdev
- xf86-video-vesa (at this point you can bring up twm)
- xorg-oclock (this may change; need a better desktop clock for the time)
- xorg-xeyes
- xorg-xload
- xv
Support packages I also installed:
- scrot (for screen shots)
- vim (a better vi)
- python3 (the best Python, and it becomes the default in the environment)
To support WiFi, I installed
- iw
- wpa_supplicant
- dialog
After installing for WiFi, I did the following
- Run wifi-menu to find the local hotspot gateway and enable wifi the first time
- netctl enable wlan0-[my_gateway_name] to enable WiFi on startup
I need to dig a little deeper into TWM. In particular I want TWM to remember what windows were up and running from prior sessions so that when I start TWM via startx the desktop comes back up the way I want it. I can hard-code some windows and their positions, but I want something more dynamic from session to session. I’ve also NOT installed emacs and medit, as vim is just fine, thank you very much. All I need to install now to get back to where I left off a while back is node.js and its various support packages for GP i/o. Then I need to move on to more than just flashing lights. Something a lot more IoT-ish, something that’s robust against many of the malevolent actors currently out on the Internet (Russia, N. Korea, Iran, NSA, FBI, and GCHQ, just to name a few).
I’m also thinking of creating and supporting a disk image that others can download with all these in place. I tried this once before but gave it up because of the original Arch Linux disk image. But that official disk image is no longer supported. Getting Arch Linux on a Raspberry Pi requires sophisticated Linux skills and experience, way beyond the typical beginner of a Raspberry Pi. This time, unlike the first time, it will be a complete basic install with GP i/o, WiFi, and TWM support installed. I’m also going to support a full 32GB image (compressed via ZIP for easier download).
I’m also going to support the older RP2 while the code still can. Once Arch Linux ARM officially goes 64-bit for RP3, then I’ll probably drop support for RP2.
I’m still playing catchup. Sorry for repeating things here I wrote about over the past few years, but at least it’s been tested with the latest Raspberry Pi 3 board.


You must be logged in to post a comment.