building and running jetson inference examples on the jetson xavier nx – CORRECTED

The original post’s instructions left out a few critical steps, and as a consequence, not everything was properly, and correctly, documented. More critically, additional setup utilities weren’t run and not captured/poorly documented.


These are directions for building and running the Jetson Inference examples on the Jetson Xavier NX running JetPack 4.4 Developer Preview. Jetson Inference was originally released for the Jetson Nano. It’s been a while since I worked with these examples on that platform, and I did not document anything, as it all seemed to work back then.

These are tl;dr instructions for guaranteed application building.

First, install the following packages:

sudo apt install libglew-dev qt5-default

Then clone a copy of Jetson Inference. You can do this anywhere, but do it in a part of the file system where you have normal (non-root) access.

git clone https://github.com/dusty-nv/jetson-inference.git

This will produce a new folder jetson-inference. Change directory into jetson-inference and execute the following git command.

git submodule update --init

Create a build directory (mkdir build), and change directory into it.

Execute CMake to create the necessary build infrastructure.

cmake ../

During the cmake process step, two scripts will be run that will display ASCII menus within the terminal. The first menu is the Model Downloader. This is how it first appears.

Only two of the models are selected by default.

I selected all of them and downloaded everything. That’s because I’m working off the Western Digital Black SSD I installed and documented two posts back (see “adding a western digital wd_black 250gb nvme drive to jetson xavier nx“)

After selecting all the models, a second ASCII menu is presented to install PyTorch.

I personally skipped this one because I want to install PyTorch using my Python 3.8.3 virtual environment, which I also built for this NX a few posts back. Once I figure out how to install the PyTorch for Python 3.8.3 I’ll revisit documenting that specific step.

Once CMake is finished, execute make within the build folder.

make -j $(nproc)

Assuming you have all six NX cores enabled, and are building on an SSD (not the boot SDXC card), then it should build fairly quickly.

Now for the running part. As a very basic smoke test, attach a Raspberry Pi Camera Module V2 to the CAM0 port. That port is on the edge of the bottom circuit board right above the power barrel connector. You might want to power down the NX when you do this.

When you come back up change back to the jetson-inference/build folder, and then:

./aarch64/bin/camera-capture

You should see something on your desktop similar to the following screen capture.

The application, when running, will take over the entire desktop. The small window will allow you to set up the application for other tasks, and if you kill the window, then the entire application exits.

I’m in the process of testing out other features found in the Jetson Interface examples on the NX and will report anything untoward or unusual when time permits. My honeydew list is calling…

enabling bluetooth audio for the jetson xavier nx

One of my biggest complaints with any of the little boards is the lack of audio with video. Some of the boards do have audio jacks, and my HDMI monitor has an audio out jack, but I’ve discovered I’ve got more than enough wires floating around and I really don’t need to add any more to the confusion. What I want to do is use Bluetooth audio hardware such as an external Bluetooth speaker to listen to the audio track on streaming video, especially videos provided by Nvidia as part of their Jetson documentation series. So I set about getting Bluetooth audio to work in my specific setup.

At first I thought it was going to be very simple to get a Bluetooth speaker paired with the Jetson NX. The video stream part isn’t an issue, as I’ve been streaming a lot and I have yet to find anything that won’t stream on either the Jetson NX or the earlier Nano.

Fixing Bluetooth Audio

Bluetooth audio, as it currently ships on JetPack 4.4/Ubuntu 18.04, is incomplete and thus broken out-of-the-box. Researching as usual via Google, I finally found instructions for making Bluetooth audio work on the Jetson TX2. I tried them for the Jetson Xaiver NX and found that they worked there as well. The full link to the original instructions is: https://docs.nvidia.com/jetson/l4t/index.html#page/Tegra%2520Linux%2520Driver%2520Package%2520Development%2520Guide%2Fhw_setup.html%23wwpID0E0KN0HA

The instructions repeated here with suitable edits are:

To enable Bluetooth audio

  1. Open a shell and using sudo, edit this file with the text editor of your choice:
    /lib/systemd/system/bluetooth.service.d/nv-bluetooth-service.conf
  2. Change this line:
    ExecStart=/usr/lib/bluetooth/bluetoothd -d --noplugin=audio,a2dp,avrcp

    …to this:

    ExecStart=/usr/lib/bluetooth/bluetoothd -d

    That is, delete the “‑‑noplugin…” switch and all of its values to the end of that line. Then save the file.

  3. Execute these commands to install the pulse audio package:
    $ sudo apt update && sudo apt install pulseaudio-module-bluetooth
  4. Finally reboot the Jetson device:
    $ sudo reboot
  5. When the reboot is complete, you should be able to pair and connect nearly any Bluetooth audio device.

Pairing the EcoXGear EcoEdge Bluetooth Speaker

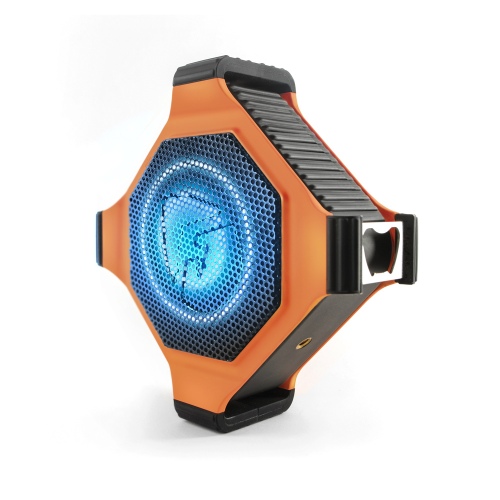
EcoXGear EcoEdge +

I purchased a pair of these at my local Costco for $40 each. You can find them on line at Amazon for the same price. I love the fact that they’re waterproof (IP67) and will float in a pool, and if I really need one, it has a bottle opener on one corner (see above). You never know when you’ll really need a bottle opener, especially here in Florida.

After installing the software you’ll need to pair the speaker with the NX. Make sure the speaker has a decent charge on it. It comes with a micro USB charging cable, but no charger. Fortunately for me I have wall warts everywhere, so that’s not a problem for me. The minimum for charging is 5V1A, so that’s not going to be a problem either.

With a decent charge on the speaker turn on the speaker by pressing its on/off button. When it turns on it will say pleasantly “power on.” Then press the Bluetooth switch to turn on Bluetooth. The speaker will announce that as well.

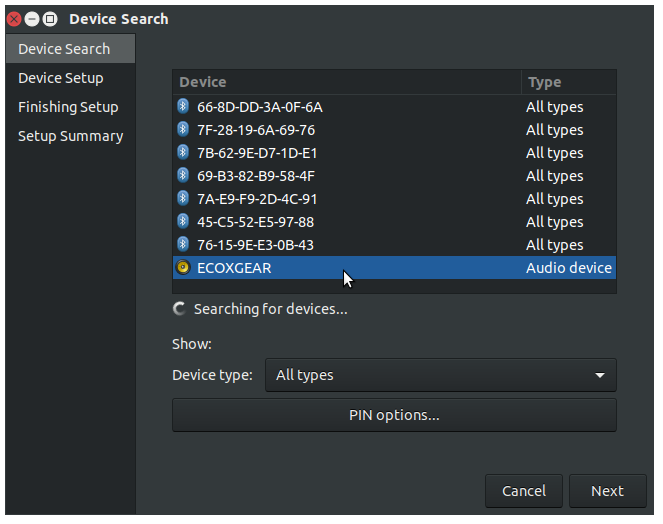
On the NX desktop, in a shell, run ‘sudo bluetooth wizard’. The little application that pops up will list a whole slew of Bluetooth MAC addresses, and an entry for the speaker, ECOXGEAR. Select that and press next.

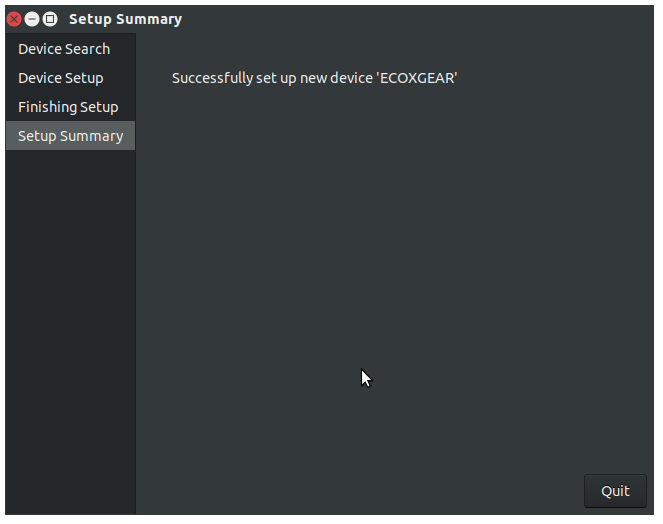
The application will quickly pair with the speaker, and the speaker will say “Connection successful.”

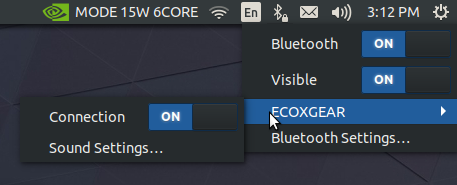
If you want to check out the hardware and test that it works, then go to the Bluetooth icon in the upper right corner of the desktop, and click for the menu.

Move the mouse arrow down to the name of the paired device. You want to see that the connection is “ON.” If you want to further test, then move over and click on “Sound Settings…”

Note the mode: High Fidelity Playback (A2DP Sink). It needs to be this in order to play audio.