
The Jetson Xavier NX is more sophisticated than it’s earlier predecessor, the Jetson Nano. The NX has an NVMe connector on the bottom of the support board for NVMe SSDs. In this post, I install, format, and mount a Western Digital WD_Black SN750 250GB NVMe SSD.
The SSD is extremely easy to add to the NX.
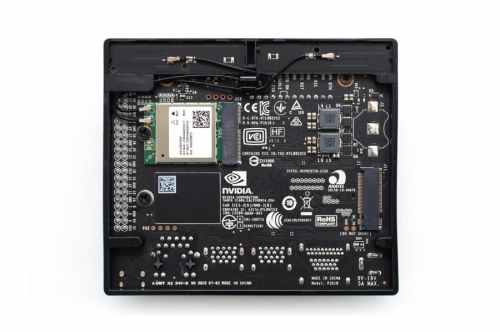
- Using a small Phillips head screwdriver, remove the screw on the left beneath the screw that is holding in the WiFi/Bluetooth adapter.
- Insert the slotted end of the SSD into the matching connector on the right of the NX board, at a 45° angle up from the board, and push gently until the slotted end snaps into the socket.
- Push down the other end of the SSD so that its left edge semi-circular hole lines up with the hole on the NX board right beneath it.
- Re-install the small Phillips head scew so that it physically holds the SSD down in place.
At this point the SSD should be flat against NX board.
Now comes the formatting and mounting of the SSD to make is usable to the NX system.
- Power up the NX and log into Ubuntu as your regular user.
- Open a shell on the desktop and execute gnome-disks. Make sure that the entry as shown below is selected. On the gear button, click and select “Format Partition…”

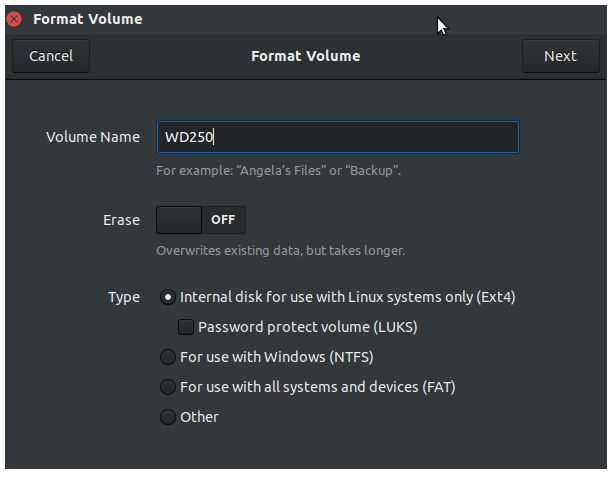
- You can type just about any standard ASCII character and number sequence for volume name. I chose WD250 because it was short and descriptive to me. I took the defaults for everything else. Click ‘Next’.
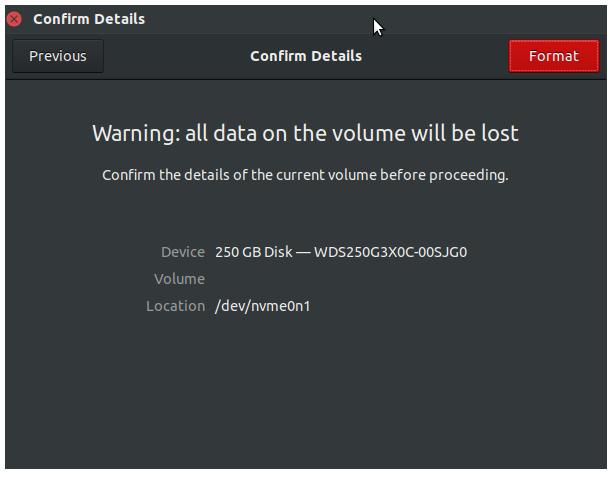
- On the ‘Confirm Details’ dialog click the ‘Format’ button.
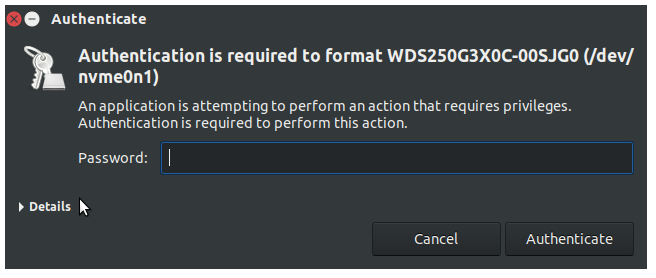
- In the next dialog, type in your password, the same password you would use for any sudo command. Then hit Enter.
- When you return back to the initial application view, you’ll see a new right arrow button. You’ll click this to mount the newly formatted disk.

- When everything is finished, the gnome-disks application will show the size in decimal GB (not base-2), the device name (dev/nvme0n1 in this example), the UUID of the device, and the mount point of the drive (/media/jnx/WS250 in this example).

You’ll note that gnome-disks shows both the new 250GB drive and another 500GB SSD, Crucial MX500. This is the drive I purchased some time back for my Raspberry Pi 4, and which I “carried forward” to use with my Jetson Nanos. It’s big and fast for what I need. But I was curious to see how it’s speed compared to the new NVMe drive, so I ran some very basic (some would say crude) tests to write data to both drives and time how long the writes took. Again, let me state this is a very rough order of magnitude.
 I used the utility ‘dd’ to write a 1GB file to both devices. Writes are a good 40% faster to the NVMe the the 500GB SSD, which is attached via a SATA to USB3 adapter.
So what are the overall benefits of replacing an external USB3 SATA SSD with the NVMe SSD?
- The obvious first benefit is speed. For building and running models, the WD_Black is second to none.
- The NVMe is a “real” drive. The boot device on the NX is a SanDisk 128GB micro SDXC memory card. It’s great for booting, but quite lousy with regards to speed.
- With the NVMe I get back a USB3 port on the NX. I’ve also noticed a problem with the USB3 SATA adapter. It appears to cause interference and problems with any other attached USB device, especially my wireless keyboard.
I’m sure there are others. As far as cost is concerned I picked up the WD_Black from Amazon for $55. I find that to be an amazingly low price for a storage device of this type. While the NVMe is only 1/2 the storage space of the SATA device, I find that the new drive is more than enough for what I currently need.

[…] I selected all of them and downloaded everything. That’s because I’m working off the Western Digital Black SSD I installed and documented two posts back (see “adding a western digital wd_black 250gb nvme drive to jetson xavier nx“) […]
LikeLike