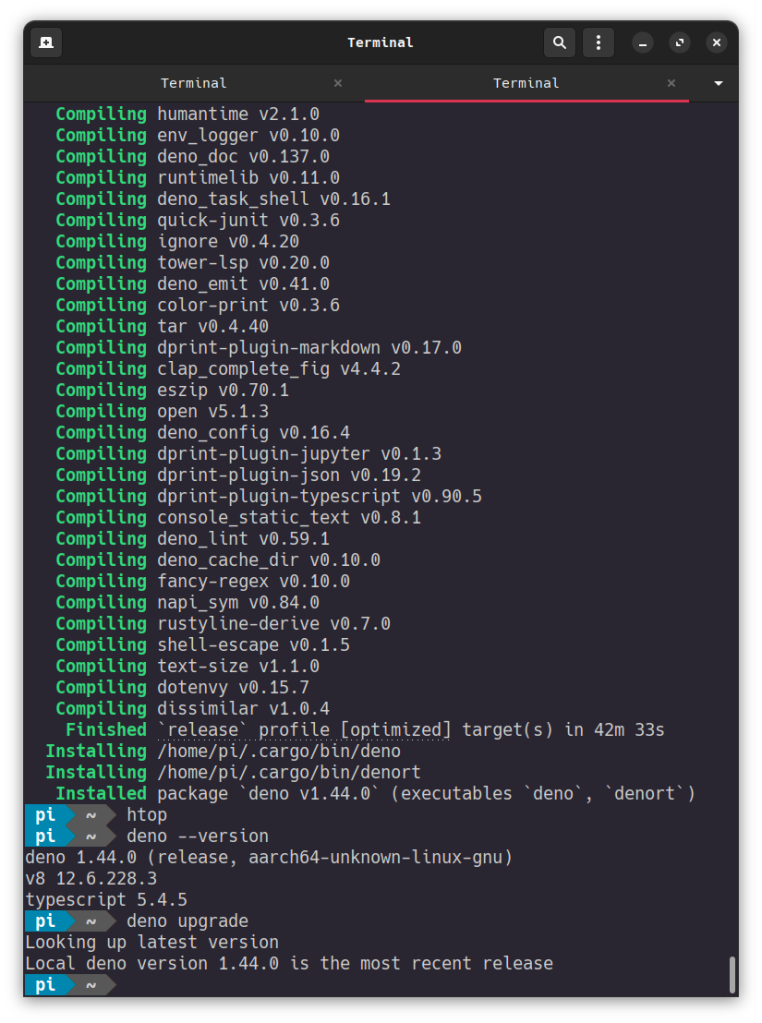
building deno 1.44.0 with rust 1.78 on a raspberry pi 5

Deno built with Rust

Rust 1.78 is available for this platform, so we’ll build Deno from its sources via Rust.

First, if you haven’t already, install Rust following the very simple directions on the Rust website ( https://www.rust-lang.org/learn/get-started ). Be advised that you’ll need to install curl and protobuf-compiler; the first to handle the installation of Rust, and the second to handle the build of deno. You should install these two packages before installing Rust and then using Rust to build deno.

After installing the two packages mentioned earlier and then installing Rust, perform cargo install deno and then go away for about 45 minutes until it’s done.

Why do it this way? First because you should install Rust, and install it locally to your login account, not globally. Second, because once again if you use apt to install rust, you only get version 1.74, not the current 1.78 stable release. When you install rust using the website’s method, you also get rustup, which allows you to keep your copy of Rust up-to-date. And if you want to do any kernel development you’ll need an up-to-date kernel (which you do have) and versions of Rust greater than or equal to version 1.77. Third, when you build deno yourself you get a whole slew of Rust crates that you can tinker with in other projects. Finally, you should use deno over node.js because the same creator of node, Ryan Dahl, is also the creator of deno; deno is far more robust and secure than node.js.

Finally, to learn more about deno and how to use it, go to https://docs.deno.com/runtime/manual and have at it.

rust code snippet — referencing toml values within a rust application

Listing 1: Rust code referencing some TOML data

I have been working with Rust for a few years now, primarily during my retirement. I’ve authored a few personal tools with it, and I’ve come to prefer working with it rather than the latest C++ compilers from GCC or Clang/LLVM. I find it expressive in ways that C++ isn’t. But Rust, like C++, isn’t perfect and it does have its quirks.

Listing 2: Opening TOML section

One of those quirks I first encountered involved an easy way to access elements in the Cargo.toml file within the Rust application itself. As I moved deeper into Rust I turned to a number of books on the language. One of those books showed how Rust worked by re-writing certain Unix/Linux command line tools in Rust. A subset of that book was command line argument processing, such as passing a version flag to the utility to check the version of the tool. I quickly noticed that the example Rust code duplicated information that was also defined in the toml file, such as the application’s name, version, author(s), and description. From decades of prior software experience the last thing you want to do is duplicate information/data between different files. Instead you want to define data in one location, in one file, and then reference that everywhere in the application and system where you need it. After a bit of searching I found one way to reference that toml information; see listing 1 above referencing the first four definitions in listing 2’s [package] section.

There’s probably a better way to reference toml information, but I used Rust’s built-in environment macros to reference this data because I learned that when you run a Rust application, that toml information is placed in the running Rust application’s environment as environmental variables. For me this is good enough.

By the way, this post marks my use of the Visual Studio Code plugin CodeSnap to create a visual snapshot of code. I’ve grown tired of trying to use WordPress’ built-in code support. The reference page for how to use it has disappeared, and even when I have used it, I can’t get decent code syntax highlighting. So this is probably what I’ll use from now on.

Links

Rust Environmental Variables — https://doc.rust-lang.org/cargo/reference/environment-variables.html