jetson nano developers kit version b01

My second Jetson Nano Developer’s Kit arrived Monday. Following Nvidia’s directions I had their version of Ubuntu up and running in about thirty minutes. I’ve mounted the Noctua NF-A4x20 5V PWM fan on top with nylon ties, exactly like the first. One reason for buying the B01 is it now comes with two MIPI CSI camera connectors on the edge, CAM0 (right) and CAM1 (left). All versions before this had only one, CAM0. The power selection block is now further inboard, and wonder of wonders, it comes with a shorting block. In the photo the shorting block is in place to select the barrel connector and I have a 5VDC 4A power supply connected via the barrel connector.

A minor editorial comment: I’ve now installed and worked with two Jetson Nano boards, the A02 and B01. In both instances I never once encountered any issues configuring, installing the OS and software tools, or attaching devices. This is counter to the insanely stupid complaints I read on Amazon where a number of knuckleheads gave the board 1 star and bitched about how terrible the Jetson Nano was. The boards are great and work just fine. But you can’t be an idiot around them, or you will break them.

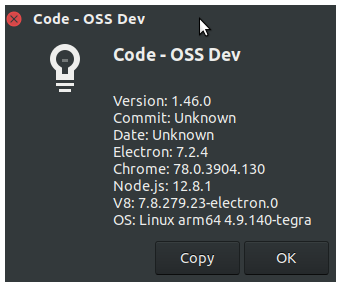
Rather than give screen shots running software you already know about, this is a screen shot where I downloaded and built Visual Studio Code. VSCode for ARM isn’t provided from the same source as all other operating systems. There is a third-party DEB file, built from a year-or-two-older version of VSCode, but no thanks. Instead, I followed the directions here ( “Building Visual Studio Code on Jetson Nano”, https://www.clarenceho.net/2019/05/building-visual-studio-code-on-jetson.html ). I made one major modification to Clarence’s directions, and that was to install NodeJS version 12 instead of 10 using setup_12.x. That’s because the current LTS is version 12. Nevertheless it built, and I was gob-smacked when it came up with the introductory screen the first time I ran it. I was then able to open Bash, C/C++, and Python source files.

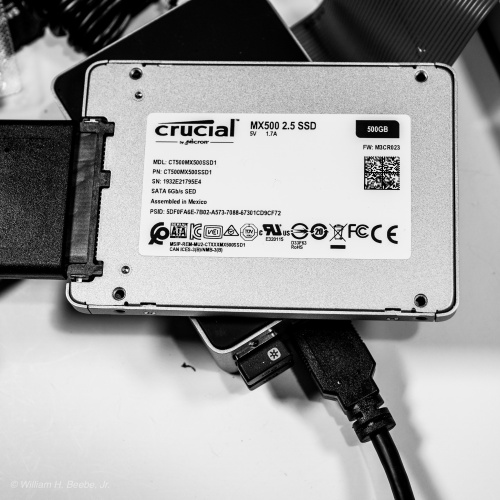
The only issue right now is I can’t install any extensions. The extension list is empty. There is a fix I have not tried yet, but which I will the next time I build VSCode. I’m building on my Crucial MX500 .5TiB SSD, so I have plenty of space to just re-clone and re-build with that fix on Clarence’s web page. I wanted to see if it would at least build without errors before I made any modifications to the product.json file. Since it obviously does work, the next step is to try and get the extensions working.

I am so happy to have this building and working on any ARM-based system.

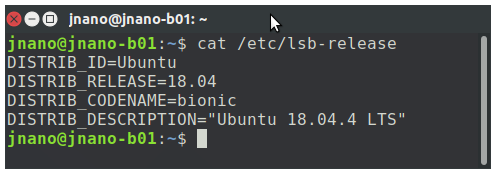
In case you’re curious we’re running with standard Ubuntu 18.04.4.

This is the fully built Visual Studio Code version, from trunk. Note that it’s version greater than the current official installable release, which is 1.44.2.

ugly surprises with raspbian buster and external file systems


A while back I wrote about adding an SSD to a Raspberry Pi 4 and modifying /etc/fstab so that it would automatically mount when it booted. This is different than having it automount through /media/pi, since that type of automount only occurs after the OS is fully up and then scans for attached devices, such as those on USB. For nearly all use cases you can’t tell one from the other. But for those very few use cases where you need the kernel to mount the attached storage device before the rest of the system comes up, you need to define it in /etc/fstab.

That wasn’t a problem with Raspbian Buster up until just recently. Before that time, I had an entry for my SSD in fstab that started out like this:

/dev/sda1 ...

It worked just fine, until one day after a recent update that included the kernel, it didn’t. No warning that this was going to happen, none at all. After the update and subsequent reboot, the Raspberry Pi refused to boot, and instead dropped me into a prompt waiting for me to log in as root to fix the problem. Oh, wait, root is disabled by default in Raspian, so that just put me in an endless boot loop.

It took two attempts rebuilding a minimal boot micro SDXC before I finally figured out what was happening. Fortunately, that second micro SDXC card was a new one with a minimal Raspbian system, so it didn’t take too much effort to see that adding the entry to /dev/sda1 was causing it to fail to boot. Fortunately for me I have other Linux systems (my ten-year-old Samsung R580 running Ubuntu 18.04.04 came to the rescue) that allowed me to mount both micro SDXC cards, edit fstab and remove the entries. Once removed, both micro SDXC cards booted just fine in the Raspberry Pi 4.

Once I got back in I enabled root with ‘sudo passwd root’ and gave it a password. Now, if I have a problem where a Raspbian boot failure wants to dump me into the root account in single user mode, I can actually log in at that point.

The other problem was getting the USB SSD to mount. Here’s what I did to fix that. But first, a tiny bit of background.

The kernel in Raspbian buster uses what’s now known as a PARTUUID to identify a storage device instead of the old school device name in /dev. To find out what that PARTUUID is, you have to run this command at the command line in a terminal window:

pi@rpi4-4-01:~ $ sudo blkid/dev/mmcblk0p1: LABEL_FATBOOT="boot" LABEL="boot" UUID="69D5-9B27" TYPE="vfat" PARTUUID="d9b3f436-01"/dev/mmcblk0p2: LABEL="rootfs" UUID="24eaa08b-10f2-49e0-8283-359f7eb1a0b6" TYPE="ext4" PARTUUID="d9b3f436-02"/dev/sda1: LABEL="SSD" UUID="ad89d540-a007-4d0a-887b-0b0dbefe3e8e" TYPE="ext4" PARTUUID="937a0120-01"/dev/mmcblk0: PTUUID="d9b3f436" PTTYPE="dos"

Since I already know the label on my SSD is “SSD” it’s quickly identifiable in blkid’s output. Copy the PARTUUID at the end of the entry, and use that in the fstab entry for the drive, like so:

PARTUUID=937a0120-01 /ssd ext4 defaults,auto,users,rw,nofail,x-systemd.device-timeout=30 0 0

Note that the quotes are not added to the entry. Also note all the flags I use, especially the shortened timeout (systemd.device-timeout=30) to shorten the wait during boot in case the SSD isn’t plugged in. The default is 90 seconds.

The primary reason I want the SSD mounted is because that’s where I put swap. In /etc/dphys-swapfile I add the following line:

# where we want the swapfile to be, this is the default#CONF_SWAPFILE=/var/swapCONF_SWAPFILE=/ssd/swap

I want my swap on the SSD because testing has shown the SSD is an order of magnitude faster than the boot micro SDXC. I use the Raspberry Pi 4’s as development and native build machines, rather than set up an emulation and cross-compile tool chain on my Mac. Believe it or not, it’s a lot simpler the way I have it set up. This is a decent compromise that doesn’t require me to put the entire OS on the SSD and then configure the Raspberry Pi to boot off the SSD. There are some significant problems with that, such as the Rasberry Pi 4 wasn’t set up to do that for quite some time after its release, and the fact that once configured that way, you can’t go back. So I put swap on the SSD, then cd onto a work area on the SSD and develop and build away.

This all gets back to the bigger question: why did this change, and when did it change? I use the same type of setup, and the same SSD, on the Jetson Nano, and it’s running a tweaked version of Ubuntu 18.04.04, complete with the Ubuntu graphical desktop. The fstab entry for that is the regular device entry, /dev/sda1.

Oh well. I just keep reminding myself that this is just a hobby, and I’m retired.