
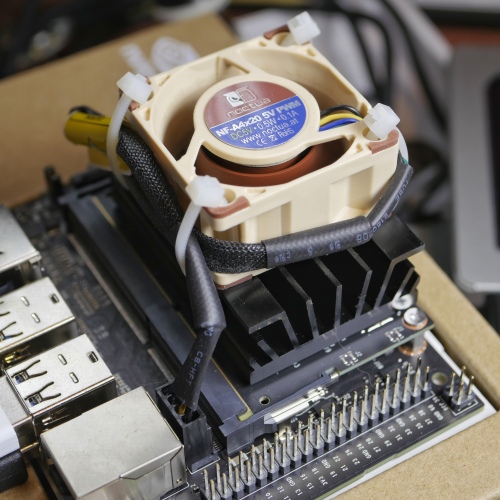
As was mentioned in the last post, the fan is turned on via the jetson_clocks utility that’s part of the initial Ubuntu 18.04 installation. This capability is provided so that heat from the board can be quickly dumped when running it and the GPU under load.
What is jetson_clocks, you ask? Let’s do a quick rundown.
nvidia@jnano-01:~$ file `which jetson_clocks`/usr/bin/jetson_clocks: Bourne-Again shell script, ASCII text executablenvidia@jnano-01:~$ jetson_clocksError: Run this script(/usr/bin/jetson_clocks) as a root usernvidia@jnano-01:~$ sudo jetson_clocks --helpMaximize jetson performance by setting static max frequency to CPU, GPU and EMC clocks.Usage:jetson_clocks.sh [options] options, --show display current settings --store [file] store current settings to a file (default: ${HOME}/l4t_dfs.conf) --restore [file] restore saved settings from a file (default: ${HOME}/l4t_dfs.conf) run jetson_clocks.sh without any option to set static max frequency to CPU, GPU and EMC clocks.nvidia@jnano-01:~$Not much to the script operationally, and in order to use it, even for help, you need to preface it with sudo. That can get quite annoying if you accept how this Ubuntu’s /etc/sudoers file is set up, so here’s how to fix this Ubuntu from asking for your password every time you invoke sudo. On the %sudo line, add NOPASSWD: to the line as shown:
# Allow members of group sudo to execute any command%sudoALL=(ALL:ALL) NOPASSWD:ALL
If you’re new to Linux or uncomfortable in general with messing with such configurations, then leave it alone. I have fat-fingered NOPASSWD in the past and screwed up my ability to invoke sudo, which can be quite annoying if you don’t have root access.
With that out of the way, you’ll note that there’s four ways to invoke jetson_clocks. The most common way is without any command-line switches. That turns on the fan at full RPM, and will generate the most noise. Yes, the fan is very quiet, but in a quiet room you can still hear the white noise of the spinning fan. You can turn down the RPM by invoking --store and then --restore.
If you store with no other arguments then the text output is stored in ~/l4t_dfs.conf. That’s the good news. The bad news is that you had to use sudo to get that file, and the ownership is root. To change that to your regular ownership (nvidia in this example) you would need to invoke sudo chown nivdia:nvidia l4t_dfs.conf. I used the username nvidia in this example because that’s how I set up the initial account. You can call your initial login account ‘george’ or ‘ringo’ or whatever fits best for you. It’s that local username (and by the way, the group name as well) that you want to change ownership of that file to. Once it’s changed, open it up in an editor. I use vi/vim, but gedit is also provided. Whatever editor you want to use, open it up:
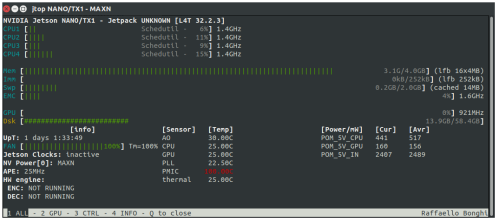
/sys/devices/system/cpu/cpu0/online:1/sys/devices/system/cpu/cpu1/online:1/sys/devices/system/cpu/cpu2/online:1/sys/devices/system/cpu/cpu3/online:1/sys/devices/system/cpu/cpu0/cpufreq/scaling_min_freq:1428000/sys/devices/system/cpu/cpu1/cpufreq/scaling_min_freq:1428000/sys/devices/system/cpu/cpu2/cpufreq/scaling_min_freq:1428000/sys/devices/system/cpu/cpu3/cpufreq/scaling_min_freq:1428000/sys/devices/system/cpu/cpu0/cpuidle/state0/disable:1/sys/devices/system/cpu/cpu0/cpuidle/state1/disable:1/sys/devices/system/cpu/cpu1/cpuidle/state0/disable:1/sys/devices/system/cpu/cpu1/cpuidle/state1/disable:1/sys/devices/system/cpu/cpu2/cpuidle/state0/disable:1/sys/devices/system/cpu/cpu2/cpuidle/state1/disable:1/sys/devices/system/cpu/cpu3/cpuidle/state0/disable:1/sys/devices/system/cpu/cpu3/cpuidle/state1/disable:1/sys/devices/57000000.gpu/devfreq/57000000.gpu/min_freq:921600000/sys/devices/57000000.gpu/railgate_enable:0/sys/kernel/debug/clk/override.emc/clk_state:1/sys/devices/pwm-fan/target_pwm:128/sys/devices/pwm-fan/temp_control:0
At the bottom of the file, on the line with target_pwn, the default is 255 when you save it. To change it to a more reasonable value, such as 128, simply do that and save it back out. Then execute sudo jetson_clocks --restore and it will use that file to set the fan RPM to the lower value, which in this case is 1/2 what the maximum is. The fan will slowly slow down to the new value, and it will get very, very quiet.
Once again, note that restarting the Nano will stop the fan from spinning. You have to explicitly restart the fan.

You must be logged in to post a comment.