
This is the lightest of lightweight comparison of Vim 9 and Neovim stable release 0.9.5 running under Ubuntu 23.10 on a Raspberry Pi 5.
Vim 9 is the regular package installation bundled with Ubuntu 23.10, while Neovim was built from source. Neovim was built from source because the latest neovim version available was 0.7.2 (via apt show neovim); if you’ve been following Neovim then you will know how much has changed since stable release 0.8, so that makes 0.7.2 pretty much a non-starter.
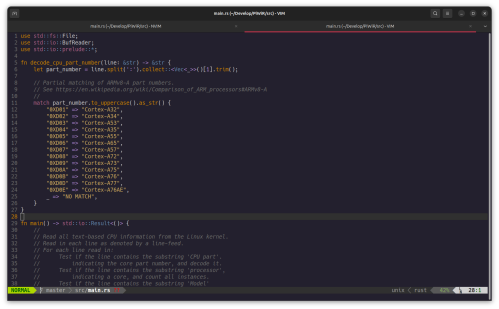
Vim 9 is running with the Afterglow color scheme and PowerLine for the status line layout at the bottom. I’ve written about this already. The code common to both examples is a simple command-line utility I wrote in Rust, which is also installed on this Raspberry Pi. I’ve been a vi user since at least the early days when I was exposed to BSD Unix via DEC Ultrix running on a MicroVAX, back around 1985. Once exposed I stuck with it because anything else back then for editing source code was horrific to use by comparison. Of course there was no coloration back then. If you wanted color you either used a white, green, or orange monitor. Your choice.
I should note that VIM 9.1 was released on 2 January 2024, but the way distributions are managed you won’t see it in the regular distributions unless you, the user, take extraordinary actions, such as using an alternative repo, use Flatpack or Appimage, or build from source. Because the Raspberry Pi 5 is ARM based, there is no Flatpack or Appimage except for x86_64. As for Snaps, well, nothing there for this platform, and if there were I wouldn’t touch it. Vim 9 is sufficiently stable that it’s good enough as is.
I found the color scheme Afterglow to be easy on the eyes and quite helpful reading and writing source code. Where-ever I use Vim, I have Afterglow installed side-by-side.
I built Neovim because I wanted to give it a try on the Raspberry Pi. There are instructions to install from source on the Neovim website. They’re quite clear and it took very little time to build my copy and install it for use. To make it easier on me I executed the following:
make CMAKE_BUILD_TYPE=RelWithDebInfo CMAKE_INSTALL_PREFIX=/home/pi/tools/neovim-0.9.5/
There are instructions in the Neovim documentation that illustrate almost the same command sequence. I’ve reached a point where I have a ~/tools folder in my home folder to install whatever, so that I don’t have to use sudo to make it all available. Yes, I have to add a bit extra to my $PATH, but the little extra effort makes my regular environment much cleaner as a consequence, especially if I want to clean it all out later.
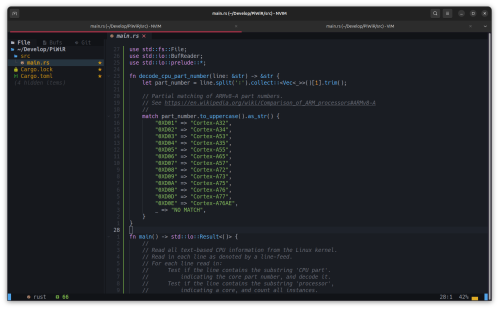
After building and installing my local neovim binary, I installed the AstroNvim Neovim configuration. And one other piece to install: I had to download and fully install all the Hack Nerd fonts from GitHub (see link below). I downloaded Hack.zip, unzipped everything, then copied all the Hack font files into ~/.local/share/font, logged out and then back in again to pick up all the fonts. If you don’t download the full set then you wind up with oddball square glyphs instead of the special characters that Neovim and AstroNvim use.
Then I started nvim and got to work.
I particularly like the way that Neovim plus AstroNvim works, creating a quite powerful IDE-like environment. In the example above I’ve used the predefined key sequence [SPACE] e to open a file view column to the left. I can use either the arrow keys plus the space bar to select any item, or I can click with the mouse. It can handle multiple open and tabbed files to the right, and it still has the complete vi key sequence to work with.
I believe that regular Vim, especially versions 9 and later, is a perfectly decent vi clone. But given the choice between vim and neovim, I’ve started to install and use neovim over vim.
Links
Vim Home — https://www.vim.org/
Vim Afterglow color scheme — https://vimcolorschemes.com/danilo-augusto/vim-afterglow/
Neovim Home — https://neovim.io/
AstroNvim — https://github.com/AstroNvim/AstroNvim
Nerd Fonts (just download Hack.zip) — https://github.com/ryanoasis/nerd-fonts/releases
…


You must be logged in to post a comment.