Executive Summary
I came across a post on Jeff Geerling’s blog about how to install Windows 11 as a VM on a Raspberry Pi. Being retired and with plenty of “leisure” time on my hands, I decided to follow along and see what it was like, so I set out to install the same tools using the same essential process he did. I got it to work (barely), but I wasn’t impressed with the results. It took me an entire day to get it all installed and running, only to eventually fail. In the end I deleted everything.
Installation and Setup
Before I get started, let me document my Raspberry Pi 5 setup, because it’s a little different than stock.
- Raspberry Pi 5 Model B Rev 1.0 with up-to-date firmware
- 8 GiB memory
- Raspberry Pi official active cooling fan
- Raspberry Pi M.2 HAT+
- Timetec 512GB M.2 2242 NVMe PCIe Gen3x4 SSD
- Ubuntu 24.04.2 for Raspberry Pi booting off the SSD
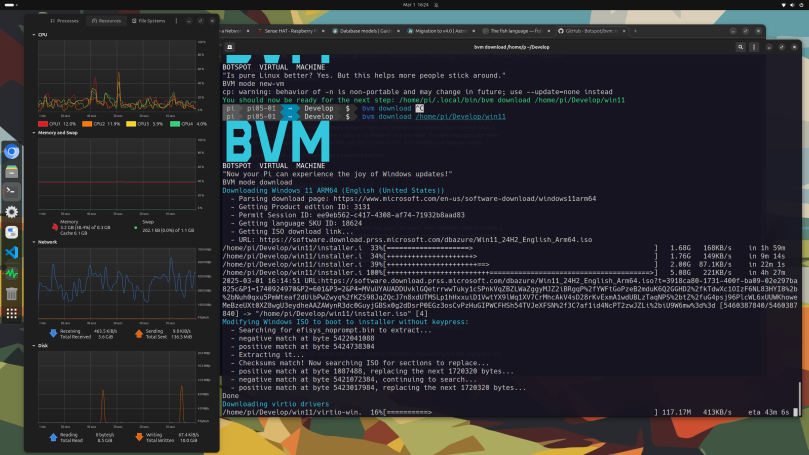
The Geerling post links to the creator and developer of the system for installing the ARM version of Windows 11, Botspot Virtual Machine, or BVM, on GitHub. While the directions for installing this is on GitHub, Geerling’s post links to a YouTube video he produced of him installing the software and getting Windows 11 running. I think that video is a bit deceptive concerning how much time it takes to get everything installed. In my case, just getting the ISO downloaded took over seven hours. Here’s a screenshot showing my desktop with System Monitor and a terminal with BVM doing its thing.
The amount of time to download Windows 11 ARM64 can be seen in the middle of the terminal, in the text section beneath “Downloading Windows 11…” There are four consecutive lines of text, with the time it took each operation timed on the far right. Totaled up, it took over seven hours to download the ISO. The download speeds are in the low hundreds of kilobytes. I’ve never seen anything that slow before, even on an old Raspberry Pi 2 or 3. Downloading the virtio drivers took another two hours. And then there was the step installing Windows 11 itself.
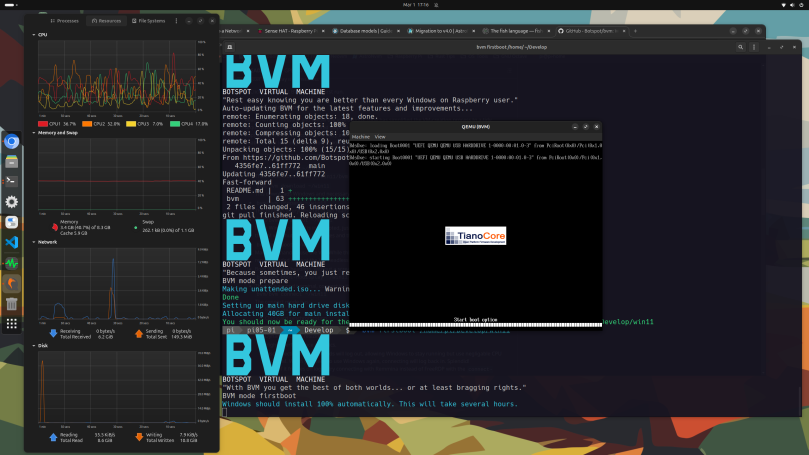
Even BVM warned “This will take several hours,” and it wasn’t wrong. It took several hours.
Operation
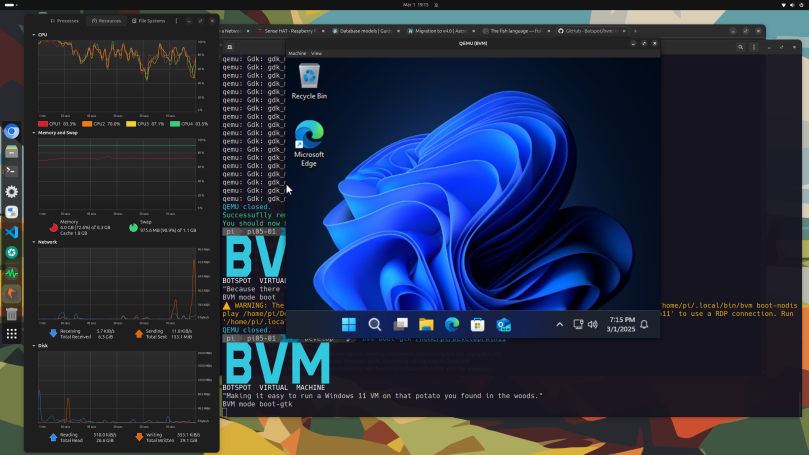
After a period of nearly 12 hours, from early in the morning until late in the evening, I managed to bring up a small Windows 11 640 x 480 window on the desktop.
I briefly tried to expand that resolution to something more useful, but this version of Windows wouldn’t allow me to change the screen resolution. You’ll note from System Monitor that I nearly exhausted swap. I closed the Windows VM at this point and increased local swap from 1 GiB to 4 GiB. One other notable difference, on Ubuntu at least you need to run bvm boot-gtk instead of bvm boot.
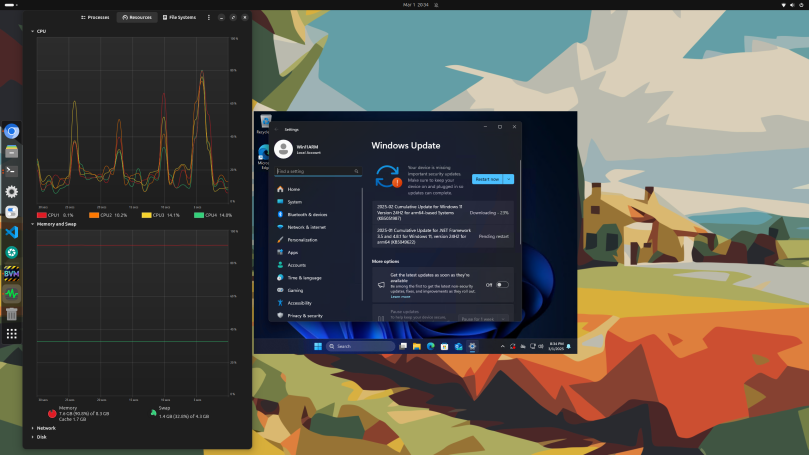
I did follow the BVM README and restarted the Windows 11 VM as headless in one terminal, then ran bvm connect in a second terminal. This produced the screen you see above. Desktop performance was greatly improved and the screen is a little bigger, but I don’t know what the resolution is. Unfortunately I can neither resize nor move it. That window is right smack in the middle of the desktop. I should note once again on System Monitor that swap usage is now at 1.4 GiB. It might be best to run this on a Raspberry Pi with 16 GB. I should also note that even with active cooling running (and the fan did kick in) the CPU temperatures hovered between 60° and 65° C.
Summary
I’m glad I gave this a try. But after these experiences I’m not so certain I’ll keep it on my Raspberry Pi.
Update
I let Windows 11 finish downloading its updates (see the last screenshot above), then I rebooted the Windows 11 VM. After that, headless operation no longer worked. Even bvm boot-gtk no longer worked. So the whole conglomeration was deleted from my Raspberry Pi and all used disk space (in the tens of gigabytes) was recovered. My advice: If you need to get Real Work done, instead of just “bragging rights,” then go shopping on Amazon and pick up one of the current micro PCs with Windows 11 Pro installed for around $300 and use that for your Windows 11 needs.
Links
Windows 11 Arm VMs on a Raspberry Pi, with BVM — https://www.jeffgeerling.com/blog/2025/windows-11-arm-vms-on-raspberry-pi-bvm
Botspot Virtual Machine – Windows 11 QEMU KVM on ARM Linux — https://github.com/Botspot/bvm

You must be logged in to post a comment.