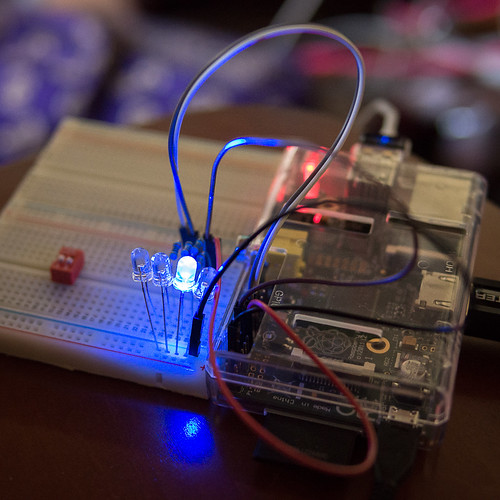
Yesterday marked the second birthday of the Raspberry Pi. It was two years ago on 1 March 2012 (well, actually, 29 February, as 2012 was a leap year) that the Raspberry Pi was officially released (after months of speculation and pre-release ordering). It was an instant hit, selling 100,000 on its first day. Since that inaugural date it’s passed the 2.5 million mark, and continues on at a healthy pace. Mine were purchased a year ago March, but due to my circumstances I didn’t really start to dig in with the R-Pi until around Christmas.
Most of my time has been spent on “loftier” goals, such as building a development environment on the R-Pi using Arch Linux Arm. Arch Linux has turned out to be a good choice for me, better than the others originally presented for the R-Pi. I’ve also installed and gotten used to writing applications in Javascript on the R-Pi using Node.js. Using all that I’ve learned so far I wrote the following little script to flash four LEDs back and forth using the GPIO pins. I would have used two, but it looked a bit silly with just two LEDs going back and forth, so I added two more.
// NOTE: Code written for Raspberry Pi Model B.// NOTE: Pin 13 is GPIO 27//var Gpio = require('../onoff').Gpio,led1 = new Gpio(17, 'out'), // Header pin 11led2 = new Gpio(18, 'out'), // Header pin 12led3 = new Gpio(27, 'out'), // Header pin 13led4 = new Gpio(22, 'out'), // Header pin 15iv1,shifter = 1,multiplier = 2;// LEDs have 50 ms on period. Loop period is 200 ms.//iv1 = setInterval(function() {led1.writeSync(shifter & 1 ? 1 : 0); // 1 = on, 0 = offled2.writeSync(shifter & 2 ? 1 : 0);led3.writeSync(shifter & 4 ? 1 : 0);led4.writeSync(shifter & 8 ? 1 : 0);shifter *= multiplier;if (shifter > 4) multiplier = .5;if (shifter < 2) multiplier = 2;}, 50);// Stop blinking the LEDs and turn them all off after 10 seconds.//setTimeout(function() {clearInterval(iv1); // Stop blinkingled1.writeSync(0); // Turn LED 1 off.led1.unexport();// Unexport GPIO and free resourcesled2.writeSync(0); // Turn LED 2 off.led2.unexport();// Unexport GPIO and free resourcesled3.writeSync(0); // Turn LED 3 off.led3.unexport();// Unexport GPIO and free resourcesled4.writeSync(0); // Turn LED 4 off.led4.unexport();// Unexport GPIO and free resources}, 10000);Following is a sample video clip showing the LEDs in action. I apologize in advance for requiring Flash to view this. I uploaded this to Flickr, and I guess Flickr hasn’t gotten the memo yet on HTML5 video.
The key to flashing back and forth is lines 17, 18, and 19. Line 17 shifts a single bit left or right depending on the multiplier, which can either be 2 or 1/2 (.5). Lines 18 and 19 decide when to set the multiplier to either shift right (2) or left (.5). I tried to use the bit operators in Javascript, but found that the code would have been a bit clunkier and longer if I had. I could have also put an ‘else’ clause in front of the second if statement, but decided not to. We’re not dealing with time critical testing here, and I preferred short, simple statements in this example.
If the code looks a bit familiar, it should. I started with the flash_led.js example in the onoff examples directory, and hacked it from there. It took me about 30 minutes of tinkering and hacking to get it to work. I would have done it in half the time except I was switching my attention between this and “Gravity” on the Blu-ray player.
I also decided to use a simpler breadboard as apposed to the larger, more sophisticated Parallax Professional board. I’m using the board for which it was intended, as a Propeller development board, and using I2C to tie the R-Pi to the Propeller, with the Propeller and the R-Pi working together, doing some interesting things for me.
Here’s hoping I don’t get bored with the R-Pi or allow some other major event to stop me from working with it.
Camera Used
I used my Olympus E-M5 with the Panasonic 1.4/25mm sitting on a Gorilla Hybrid. It was a nice compact rig that allowed me to set the camera fairly close to the R-Pi and the LEDs. I was generally pleased with the output (we’re not talking Oscar material here), but I was somewhat annoyed with the very minor shaking I see going on in the video. I thought I had the vaunted five axis stabilization enabled when I hit the video record button. I need to go back and see just how all that is set up.

