I’m starting an informal series about all the little microcontroller experimenter boards I’ve been picking up, especially the inexpensive ones that cost US$10 or less. This post is about the SparkFun Pro Micro — RP2040, which can currently be purchased for US$10.95 from SparkFun ( https://www.sparkfun.com/products/18288 ).
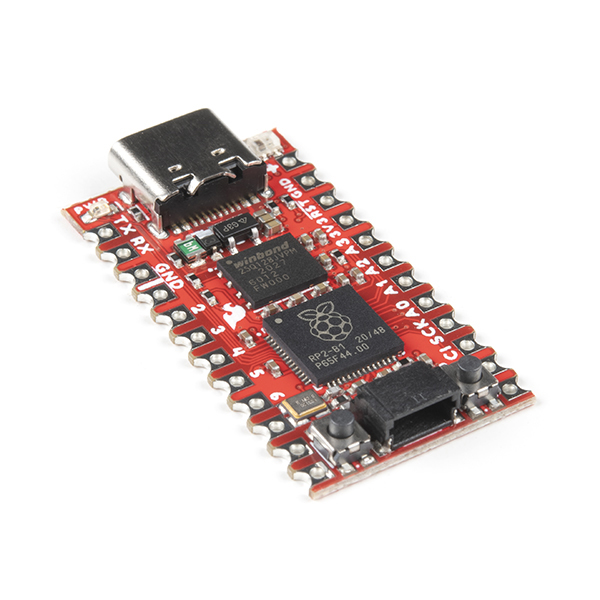
Figure 1: Sparkfun Pro Micro — RP2040 (image via SparkFun)
The Pro Micro is the same width and almost twice the length of the Adafruit QT Py ESP32-C3, another $10 microcontroller experimenter’s board. The board comes with castellated edges, providing the experimenter or designer with the ability to solder the board directly onto the surface of a larger circuit board. While there are far fewer I/O pins brought out to the edges as there is in a stock RP2040 Pico board, it does have four times as much storage flash (16MB), a NeoPixel LED in place of the standard red LED on the Pico, and a QWIIC connector on the other end. It also has USB-C in place of micro USB on the other end. For for an extra six dollars over the cost of a bare Pico you get a device that’s a lot more civilized. I think the inclusion of the QWIIC connector alone is worth the extra six dollars.
Figure 2: Pro Micro RP2040 general pinout (image via SparkFun)
This is the most complete pinout diagram for a microcontroller I think I’ve ever seen. Not just the pins, but key functionality around the board is documented as well. You can do just about anything with only this diagram to refer to. But that’s just me.
I want to call your attention to the boot and reset buttons at the bottom edge next to the QWIIC connector in conjunction with putting the Pro Micro in bootloader mode. Let’s say you want to put the latest Circuit Python firmware on this board. Plug a USB cable into your computer and then into the board. Press and hold the boot button. Press and release the reset button, then release the boot button. The RPI-RP2 flash drive will show up on your computer, at which point you can drag-and-drop (or copy in a console) the Circuit Python UF2 firmware to RPI-RP2. Once the UF2 firmware has finished copying, the board will reboot itself and the regular CIRCUITPY storage device for that board will appear on your computer.
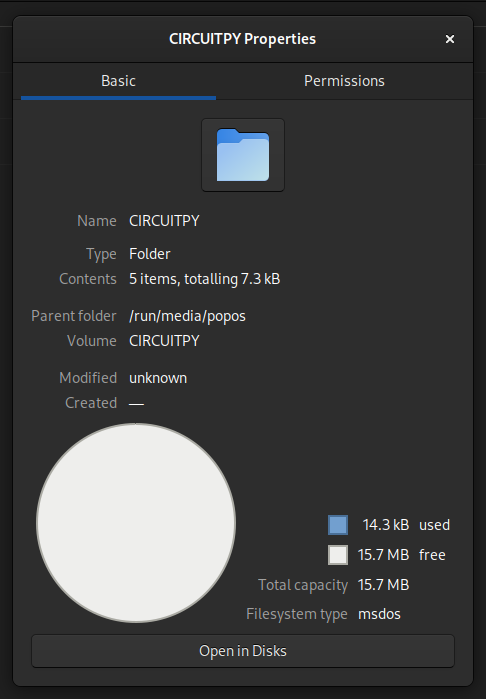
Figure 3: How the Pro Micro’s built-in flash appears on Fedora 36
And here’s my version of blinky Python code to blink the on-board WS2812 addressable LED.
"""NeoPixel blink example for RP2040-based boards such as the Sparkfun Pro Micro RP2040.The example requires two libraries from the Adafruit CircuitPython Library Bundle.Download the bundle from circuitpython.org/libraries and copy the following files to yourCIRCUITPY/lib folder:- neopixel.mpy- adafruit_pixelbuf.mpyOnce the libraries are copied, save this file as code.py to your CIRCUITPY drive to run it."""import boardimport neopixelimport timenp = neopixel.NeoPixel(board.GP25, 1)neopixel_colors = [(64, 0, 0), # red(0, 64, 0), # green(0, 0, 64), # blue(0, 64, 64), # cyan(64, 0, 64), # magenta(64, 32, 0), # yellow(0, 0, 0)# black]while(True):for color in neopixel_colors:np.fill(color)time.sleep(0.5)np.fill(neopixel_colors[-1])time.sleep(0.5)
These little boards are powerful, easy and cheap. And they’re a lot of fun to work with!
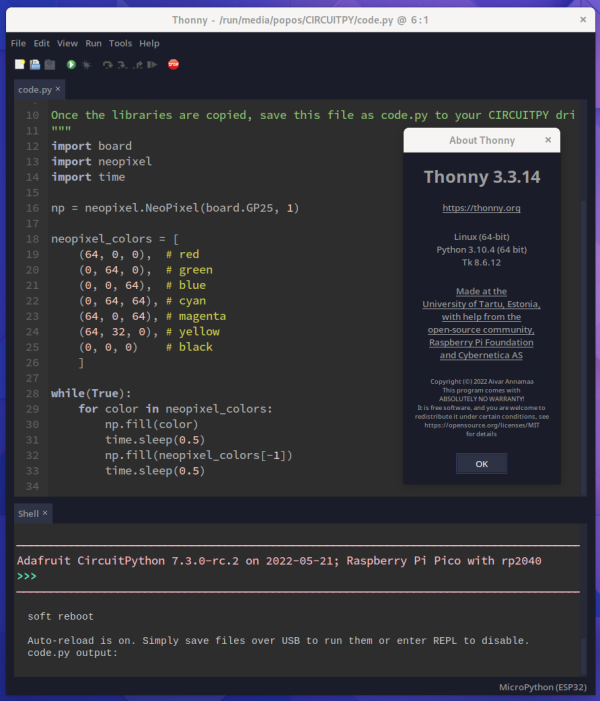
FIgure 4: Thonny editing the code and communicating with the Pro Micro
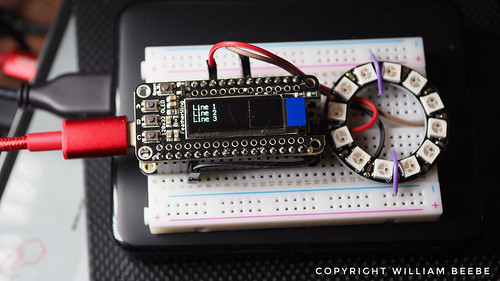
Here we are with what is probably, practically, a reasonable stopping point for refactoring my Circuit Python code. In this post I’ve broken up the earlier monolithic code.py into a series of smaller, more easily understandable and maintainable files, and then rewritten code.py to make use of the new code structure. Before we start digging through the code, let’s see what it does now.
Everything is reset and initialized, showing three lines of text.
I wrote in the last refactoring post that one of my goals was to create a class to manipulate the Featherwing’s OLED display. That class would initialize the display and provide convenience methods to change the text across three horizontal lines on the OLED display.
Why only three lines of text? The OLED display has a pixel resolution of 132 pixels long by 32 pixels high. A single line of text has a height of 8 pixels. Add a 1 pixel space at the top, and another at the bottom, and a line of text across the OLED now takes 10 pixels of height. With only 32 pixels total, I can at best clearly display only three lines of horizontal text. The OLED control class shows those three lines when the software restarts, as you can see above. Those lines are part of the initialization routine, which I’ll show later.
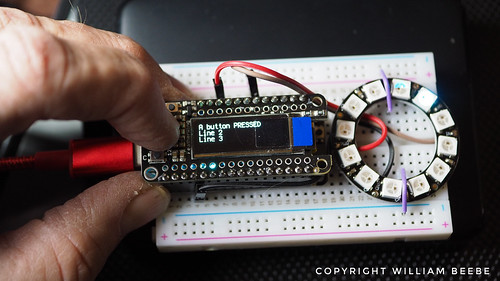
Now to test. I’ve reached over and pressed the ‘A’ button on the edge of the Featherwing. That actions causes ‘A button PRESSED’ to be displayed on the first line.
When I release the ‘A’ button, ‘A button released’ is displayed on line 1. The ‘B’ button modifies line 2, and the ‘C’ button modifies line 3 with similar text messages. Meanwhile the NeoPixels are doing their thing while all this is happening. My current system isn’t perfect. If you pay close attention to the spinning NeoPixel ring, you’ll see a very brief stop in the circulation, then it picks back up again. Releasing the button causes the same issue. Now let’s look at the code.
The main code body, code.py, is considerably smaller than the last version. The Python code is used to “wire” the button states (pressed and released) to respective functions on the display class, Oled. Note how the while True loop has been reduced to just two lines of code. As I had originally planned, I modified the call cycle_colors() to take check_button_states() as an argument so that it could be called within the inner loop setting the NeoPixel ring LEDs. The response to button presses and releases now appears to be nearly instantaneous as the text on the OLED changes according to the button presses. But as I noted above it’s not perfect, everything is still executing in linear order, and is not true multitasking nor threading nor concurrent.
The code is in a good enough shape. It could stand more comments, but from a practical standpoint it’s suitable to build upon for my next project. I’m done with this stage. I know it’s not perfect, but as I read somewhere, “Perfect is the enemy of done.”
import boardimport displayioimport terminaliofrom adafruit_display_text import labelimport adafruit_displayio_ssd1306class Oled():def __init__(self):# Initialize the I2C bus connected to the display.# Initialize the display.#displayio.release_displays()self.i2c = board.I2C()self.display_bus = displayio.I2CDisplay(self.i2c, device_address=0x3C)self.display = adafruit_displayio_ssd1306.SSD1306(self.display_bus, width=128, height=32)# Fill the background with black.# This is a monochrome display, so there can be only black# or white.#self.splash = displayio.Group()self.display.show(self.splash)self.color_bitmap = displayio.Bitmap(128, 32, 1)self.color_palette = displayio.Palette(1)self.color_palette[0] = 0x000000 # Blackself.background_sprite = displayio.TileGrid(self.color_bitmap, pixel_shader=self.color_palette, x=0, y=0)self.splash.append(self.background_sprite)self.label1 = label.Label(terminalio.FONT, text="Line 1", color=0xFFFFFF, x=0, y=3)self.splash.append(self.label1)self.label2 = label.Label(terminalio.FONT, text="Line 2", color=0xFFFFFF, x=0, y=13)self.splash.append(self.label2)self.label3 = label.Label(terminalio.FONT, text="Line 3", color=0xFFFFFF, x=0, y=23)self.splash.append(self.label3)def display_line1(self, text):self.label1._update_text(text)def display_line2(self, text):self.label2._update_text(text)def display_line3(self, text):self.label3._update_text(text)
The Oled class is mostly initialization and setup for the OLED display. The public convenience methods display_line1, display_line2, and display_line3 are wrappers around calling _update_text.
import boardfrom digitalio import DigitalInOut, Direction, Pull# Declare a class for all three buttons, A, B, and C.#class Buttons():def __init__(self):self.a_pressed = Falseself.b_pressed = Falseself.c_pressed = Falseself.a_pressed_func = lambda : Noneself.a_released_func = lambda : Noneself.b_pressed_func = lambda : Noneself.b_released_func = lambda : Noneself.c_pressed_func = lambda : Noneself.c_released_func = lambda : Noneself.a_button = DigitalInOut(board.D9)self.a_button.direction = Direction.INPUTself.a_button.pull = Pull.UPself.b_button = DigitalInOut(board.D6)self.b_button.direction = Direction.INPUTself.b_button.pull = Pull.UPself.c_button = DigitalInOut(board.D5)self.c_button.direction = Direction.INPUTself.c_button.pull = Pull.UP# Check when a button has been pressed, and when it's# released after being pressed.#def check_button_states(self):if (self.a_button.value is not True):if (not self.a_pressed):self.a_pressed_func()self.a_pressed = Trueelse:if (self.a_pressed):self.a_released_func()self.a_pressed = Falseif (self.b_button.value is not True):if (not self.b_pressed):self.b_pressed_func()self.b_pressed = Trueelse:if (self.b_pressed):self.b_released_func()self.b_pressed = Falseif (self.c_button.value is not True):if (not self.c_pressed):self.c_pressed_func()self.c_pressed = Trueelse:if (self.c_pressed):self.c_released_func()self.c_pressed = False
The class Buttons code should be quite familiar as that’s what’s been carried along now since it was originally part of code.py. Now that code has been removed and used to build the class. I much prefer this because there’s no need to declare any variables as global. Scope is now within the class.
import timeimport boardimport neopixel# For the single neopixel on the Feather itself.#s_neopixel = neopixel.NeoPixel(board.NEOPIXEL, 1, brightness=0.2, auto_write=False, pixel_order=neopixel.GRB)# For the 12 neopixel ring attached to the Feather.#neopixel_ring = neopixel.NeoPixel(board.D10, 12, brightness=0.2, auto_write=True, pixel_order=neopixel.GRB)# All the NeoPixel colors we want to display.# Even though there are four values in each color tuple,# the library code will know how to handle the late value,# which is white, and not send it to the GRB only# NeoPixels on the ring.#neopixel_colors = [(64,0,0,0), # red(0,64,0,0), # green(0,0,64,0), # blue(64,16,0,0),# orange(0,32,32,0),# cyan(0,0,0,0) # black]# Send colors to all our NeoPixels.#def cycle_colors( remote_func = lambda : None):for color in neopixel_colors:s_neopixel.fill(color)s_neopixel.show()for i in range(len(neopixel_ring)):neopixel_ring[i-1] = (0,0,0,0) # turn LED offneopixel_ring[i] = colorneopixel_ring.show()remote_func()time.sleep(.03)
Finally, the code for running all the NeoPixels. This isn’t a class, just the function and data used by that function. Note that passing in a callable function to cycle_colors() is optional. If nothing is passed in then when remote_func() is called it defaults to a no operation.


You must be logged in to post a comment.