
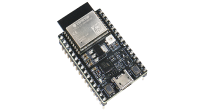
I purchased a pair of ESP32-C3-DevKitC-02 devices from Adafruit for US$10 each ( https://www.adafruit.com/product/5337 ). What attracted my attention is the ESP32-C3’s use of a RISC-V single-core SoC. RISC-V ( https://riscv.org ) is the new darling in computer architectures, the result of a collaboration in 2010 of several University of California Berkeley professors (one of which was David Patterson ( https://en.wikipedia.org/wiki/David_Patterson_(computer_scientist) ), the developer of Berkeley RISC). That collaboration produced an open standard instruction set architecture (ISA) under a BSD license that was later changed to Creative Commons license. In other words, the ISA is “open source” and anyone with the means and access to a fab can create chips (SoCs) using the ISA, as well as extending it to fit unique needs. Let me stress that there are no licensing fees associated with RISC-V, unlike ARM or x86. RISC-V ISA’s open philosophy has resulted in an explosion of interesting designs, all of it quite inexpensive.
This isn’t the first time I’ve come across a RISC-V chip. The first time was using DFrobot’s Huskeylens ( https://www.dfrobot.com/product-1922.html ), their take on an AI-powered camera; think Intel’s now-defunct RealSense cameras, except the Huskeylens costs far less. The AI portion is powered by the Kendryte K210, a dual-core RISC-V soc ( https://canaan.io/product/kendryteai ). The K210 on the Huskeylens is pretty much locked down, but the Huskeylens is never-the-less an impressive bit of kit, espeically for US$55. I wanted something more open to work with that was also low cost, thus was I drawn to the ESP32-C3.
There is a fair bit of preparation to perform before writing any code and flashing to the device. I’ve installed all the tools and getting ready to try my hand at writing C code for the C3. Before I decided to do that, I tried to establish a link with the C3 using Espressif’s iOS app, ESP Rainmaker (there’s one for Android as well). That is supposed to connect the little device to a cloud service Espressif hosts. In order to link it you install the app, then power up the C3 and hit either reset or boot. Pressing boot after power on will turn off the very bright LED (pressing it again will turn it on). If you have an application listening to the USB serial port you’ll get a lot of information including a QR code printed to the screen (I was using Arduino IDE’s serial monitor). You open the app and give it permission to use the camera to read the QR code. That’s supposed to start the process of provisioning and login to the cloud.
...09:11:35.689 -> 09:11:35.689 -> █▀▀▀▀▀█ █ ▄▄█ ▀▀▀▄▄█▄█▀█ █▀▀▀▀▀█ 09:11:35.689 -> █ ███ █ ██▄ █▄ ▄▀▀ ▀▀▀█▄ █ ███ █ 09:11:35.689 -> █ ▀▀▀ █ ▄██ ▀▀█▀█▄ ▄ ▀▀▀▄ █ ▀▀▀ █ 09:11:35.689 -> ▀▀▀▀▀▀▀ ▀ █▄▀ ▀ ▀▄█▄█▄▀▄▀ ▀▀▀▀▀▀▀ 09:11:35.689 -> ▀█ ▀▀▀▄▄ ▀ ▀ ▀█▄▀▄▀▄▀▄█▄▄ █ ▀█▀▀ 09:11:35.689 -> ▀██▄▀▀▀▀██▀ ▄▀ ██▄▀▄▄█ ▀██▀▄██▀█09:11:35.720 -> ▄██▀▄▄▀██▄▄▀▄▄█▄█▀▄▀▄▀▀▀ ▄▀▄▀ ▄▄▀ 09:11:35.720 -> █ ▄ ▀▀▀█▄ █▀▀ ▀▄▄ ▄ ▄▀▀▄█ ▀ █▀▀▄ 09:11:35.720 -> ▄▀ ▄▀▀█ █ ▀▄▄▄█▀▄▀█▀ █▀▄▀▀ ▀ 09:11:35.720 ->██▀██▀▄▀██ ▄▀ ▀▀▄▄▄ ▄█▀█ ▄█▄█▀▀▄ 09:11:35.753 -> ▄█▄▀ ▀▀▀ ▀▄ ▄█▄▀█ ▄█ ▀▀▀▀ ▀ ▄█▀ 09:11:35.753 -> █ █▀▀▄▀▀▄█▀ ▀█▄▄ ▄ █▄▀ █▀▀▀▀▄▄ 09:11:35.753 -> ▀▀ ▀▀ ▀ ▄ █ ▀▄▄▄▄██▀█▀ ▄█▀▀▀██▄▀09:11:35.753 -> █▀▀▀▀▀█ ▄█▀ ▄ █▀██▀ ▄█▀█ ▀ ██▀▀09:11:35.786 -> █ ███ █ ▀█ ▀█▄█▄█▀█▀ ▀█ ███▀█▀▄▄█ 09:11:35.786 -> █ ▀▀▀ █ ▄█▀██▀ █▀▄ ▄███▀ ▀█▀▄ ▀09:11:35.786 -> ▀▀▀▀▀▀▀ ▀▀▀▀▀▀ ▀▀▀▀▀▀ ▀ 09:11:35.786 -> 09:11:35.786 -> 09:11:35.786 -> [0;32mI (1228) app_wifi: If QR code is not visible, copy paste the below URL in a browser.09:11:35.819 -> https://rainmaker.espressif.com/qrcode.html?data={"ver":"v1","name":"PROV_8b695c","pop":"67f87fbc","transport":"ble"}[0m09:11:35.819 -> ####################################################################################################09:11:35.819 -> ______ _____ _______________ _ _ __ __ _ ________ _____09:11:35.819 -> | ____|/ ____| __ \ | __ \ /\ |_ _| \ | | \/ | /\ | |/ / ____| __ \09:11:35.852 -> | |__ | (___ | |__) | | |__) | / \| | | \| | \ / | / \ | ' /| |__ | |__) |09:11:35.852 -> | __| \___ \| ___/ | _ / / /\ \ | | | . ` | |\/| | / /\ \ | < | __| | _ /09:11:35.852 -> | |____ ____) | | | | \ \ / ____ \ _| |_| |\ | | | |/ ____ \| . \| |____| | \ \09:11:35.852 -> |______|_____/|_| |_| \_\/_/\_\_____|_| \_|_| |_/_/\_\_|\_\______|_| \_\09:11:35.885 -> 09:11:35.885 -> Welcome to ESP RainMaker led_light demo application!09:11:35.885 -> Follow these steps to get started:09:11:35.885 -> 1. Download the ESP RainMaker phone app by visiting this link from your phone's browser:09:11:35.885 -> 09:11:35.885 ->http://bit.ly/esp-rmaker09:11:35.885 -> 09:11:35.885 -> 2. Sign up and follow the steps on screen to add the device to your Wi-Fi network.09:11:35.885 -> 3. You are now ready to use the device and control it locally as well as remotely.09:11:35.919 ->You can also use the Boot button on the board to control your device.09:11:35.919 -> 09:11:35.919 -> If you want to reset Wi-Fi credentials, or reset to factory, press and hold the Boot button.09:11:35.919 -> 09:11:35.919 -> This application uses ESP RainMaker, which is based on ESP IDF.09:11:35.919 -> Check out the source code for this application here:09:11:35.919 ->https://github.com/espressif/esp-rainmaker/blob/master/examples/led_light09:11:35.952 -> 09:11:35.952 -> Please visit https://rainmaker.espressif.com for additional information.Unfortunately this is what happens for me; a panic and a reboot. Line 3 is the reason for the error, and line 5 is the panic. And this happened every time I tried, with both the iOS as well as the Android version of the app I’d installed on a Pixel 3.
09:12:08.668 -> [0;32mI (34088) protocomm_nimble: mtu update event; conn_handle=1 cid=4 mtu=25609:12:08.668 -> [0m09:12:10.327 -> W (35738) wifi:Error! Should use default active scan time parameter for WiFi scan when Bluetooth is enabled!!!!!!09:12:10.327 -> 09:12:10.327 -> Guru Meditation Error: Core 0 panic'ed (Instruction access fault). Exception was unhandled.09:12:10.327 -> 09:12:10.327 -> Core 0 register dump:09:12:10.327 -> MEPC: 0x0000000c RA : 0x40044ebc SP : 0x3fca4d90 GP : 0x3fc908a4 09:12:10.327 -> TP : 0x3fc6b5b4 T0 : 0x6d530e00 T1 : 0x4038072a T2 : 0x00010064 09:12:10.360 -> S0/FP : 0x0000004b S1 : 0x3fcbc870 A0 : 0x3fcbc900 A1 : 0x3fcaec50 09:12:10.360 -> A2 : 0x00000050 A3 : 0x00000000 A4 : 0x00000001 A5 : 0x0000000c 09:12:10.360 -> A6 : 0xffffffba A7 : 0x3fcdf860 S2 : 0x3fcdf85c S3 : 0x3fcaea20 09:12:10.360 -> S4 : 0x3fcaec4c S5 : 0x3fcbc900 S6 : 0x3fcdf86c S7 : 0x00000000 09:12:10.393 -> S8 : 0x3fca2cbc S9 : 0x00000050 S10 : 0x00000000 S11 : 0x00000050 09:12:10.393 -> T3 : 0xdfffffff T4 : 0xbfffffff T5 : 0x80000000 T6 : 0x4c747261 09:12:10.393 -> MSTATUS : 0x00001881 MTVEC : 0x40380001 MCAUSE : 0x00000001 MTVAL : 0x0000000c 09:12:10.393 -> MHARTID : 0x00000000 ...
The text where the QR code is printed out also contains a link to the source code running on the C3. I’ve looked at it briefly and have yet to discover where the error message is being printed, or where the error actually occurs. I guess that’s an exercise left to the student.
Yes, I did say I only paid US$10 for the device. I guess that’s what you get for $10, a buggy implementation. I wonder how much you’d have to spend to get one that didn’t have the bug…
I’ve seen the Guru Meditation error before. It’s a “feature” of freeRTOS ( https://freertos.org ), and I’ve encountered it too many times while working with Pycom’s FiPy development board for IoT. The FiPy board is equipped with an ESP32 with a dual core Tensilica SoC. I thought it was Pycom that had selected freeRTOS, but it appears that freeRTOS is shipped by Esperssif with their ESP32 devices. As Shakespeare’s Henry V once said, “The game’s afoot…”

You must be logged in to post a comment.